DIY Gel X Nails Made Simple: Step-by-Step Application Tips
This post may contain affiliate links, which means I’ll receive a commission if you purchase through my link, at no extra cost to you. Please read the full disclosure here.

Gel X is the game changer you’ve been looking for!
If you’ve ever struggled with at-home nail systems that chip, peel, and pop off, only to end up right back at the nail salon, you’re in the right place.
You can achieve salon-worthy nails at home, even if your past DIY attempts have failed. Consider this your redemption arc.
I’m here to share my Gel X success with you and share some tips I’ve learned.
What is Gel X?
Gel X is a soft gel nail extension that has a similar longevity to acrylics. Think of it as a level up from press-on nails. Instead of being able to press on and go, Gel X nails need to be cured under a UV light to create a strong bond.
Safety First
⚠️ Before you get started, safety is the most important. Be sure to take the proper precautions, yes, even in your own home.
Ventilation is a MUST: Nail dehydrators and primers have strong fumes. Open a window, turn on a fan, or work near fresh air to avoid dizziness or headaches. One of the first purchases you should make as a DIY nail girlie is a nail dust collector. This machine will vacuum the nail dust as you file and drill your way to a new set.
Gloves: Use gloves when applying harsh chemicals (like acetone or primer) to avoid irritation or allergic reactions. You can also purchase specific gloves for extra protection under UV lamps.
Sterilize Your Tools: Wipe files, clips, and brushes with rubbing alcohol between uses to prevent bacteria buildup (nobody wants a nail infection!).
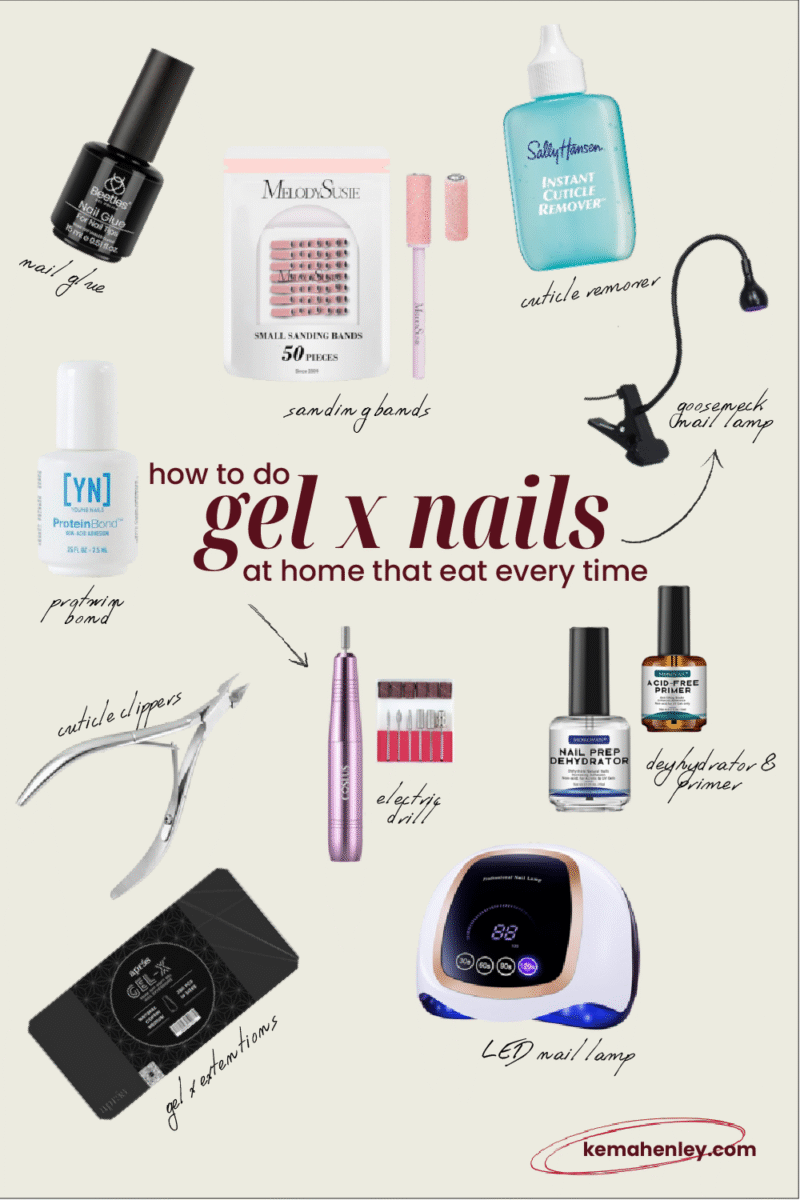
What You’ll Need
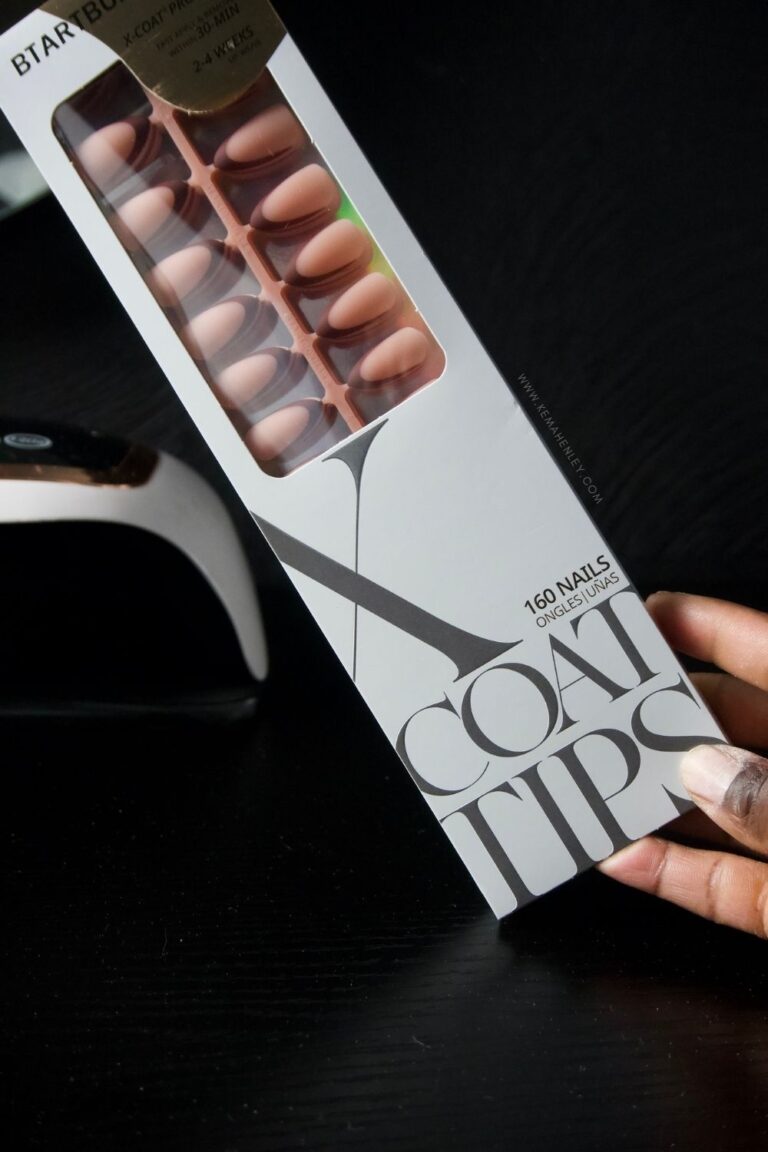
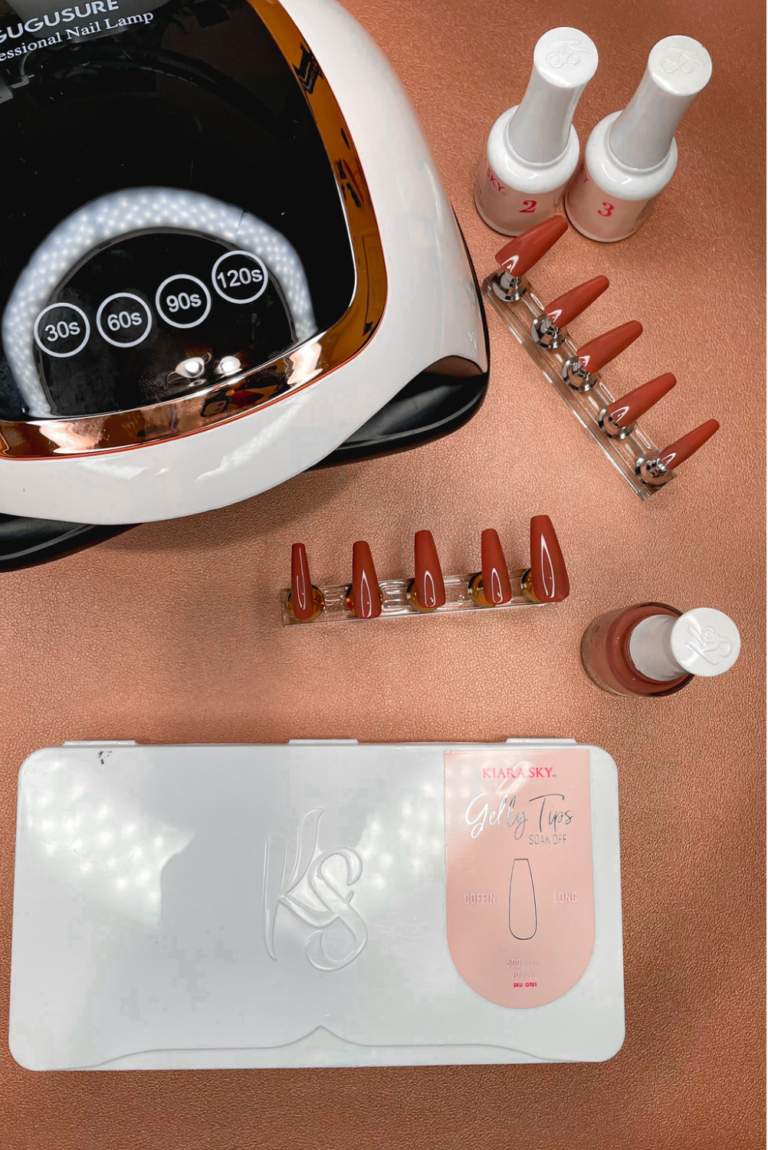
Nail Glue | Sanding Bands | Cuticle Remover | Gooseneck LED Lamp | Nail Primer & Dehydrator | Cuticle Clippers | Electric Drill | LED Nail Lamp | Gel X Extentions | Protien Bond
Step-by-Step Gel X Application
🖤 Quick Disclaimer: While I love sharing tips to help you level up your beauty game, always do your own research and patch test products first—your safety and nail health come first! What works for me might not work for everyone.
Let’s get into how to get your nails snatched and secured for the next 2-3 weeks.
Size Your Nail Gel X Extensions
Place each extension over your natural nail to decide which size is the best fit for you. You want a snug fit, not too tight. If the extension pops up when you press down, it’s too tight.
Sizing may not be perfect, but try to get the fit as close as possible. If I find myself in between sizes and the extension is a bit too big, I simply take my nail file and file away some of the excess from the sides.
Tip: As you’re sizing your nails, lay them out in the order of your fingers. Also, make note of the sizes you’ve used so you don’t have to spend too much time resizing next time.
Prep Your Nail Bed for Long-Lasting Gel X Extensions
Prepping your nails is the most important part of applying nail extensions. Take it from someone who’s gone to work with a full set and had bare hands by 5 o’clock.
First, remove the natural oils from the nail bed: Your nails produce oil, which affects how well nail glue sticks.
You can get a better application by lightly buffing the surface of your nail bed.
I prefer to use a handheld nail file instead of an electric nail bit for this step to make sure I’m not damaging my natural nail.
Cuticle Care: If your cuticles are looking a little rough. You can gently push them back and trim the dead skin. Remember not to cut the living skin.
Now, apply a single coat of the nail dehydrator and the Young Nail Protein Bond.
A little goes a long way; make sure each product is fully dry before moving to the next. This duo is your extension’s BFF; think of it as a makeup primer, but for your nails.
Applying Gel X Extensions
While the primer is drying, you can start prepping the Gel X nail extensions.
Grab your sanding bit and start to etch out the underside of the extension that will be touching your natural nails.
You only want to file up to where your natural nail will sit in the extension. This gives the glue something to cling to.
Tip: I also use this as a guideline to see how far up the glue should be placed.
Apply a thin base coat of nail glue to your natural nail and cure for 30 seconds.
Now, apply nail glue to the nail extension. I found that applying a bead of nail glue to the bottom of the extensions instead of the entire etched section helps reduce spillage from the sides.
When applying the extensions to your nail, angle the extensions starting from the cuticle, press down, and hold the nail under your gooseneck LED lamp and flash cure for 15 seconds.
In the past, when I’ve applied any form of press-on extension, I would always get bubbles under the nail, which caused my nails to pop off within 24 hours. Applying the extensions at an angle helps to avoid bubbles.
Repeat these steps for all 10 nails.
Once all 10 extensions are on, fully cure both hands for 60 seconds using the larger LED lamp..
Final Touches
When all extensions are applied. I like to examine the nails to see if any edges need a little more filing or if any gel needs to be cleaned up around the nails.
We want a clean and comfortable application.
Once I’m happy with the application, I take 100% acetone on a small nail brush and scrub where the extension meets the cuticle area.
This helps to melt the edge of extension for a more seamless look.
Finally, buff the shine off the top of your nail extension to apply your favorite polish.
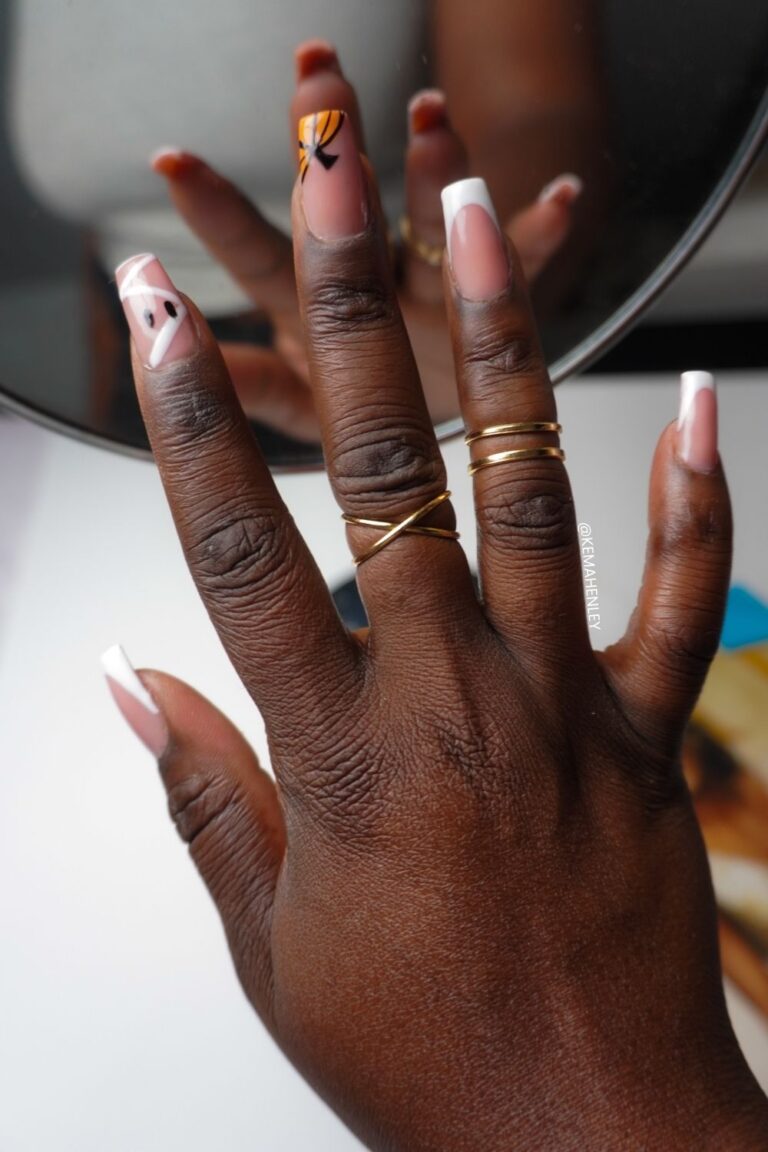
Volia! You’ve just leveled up your nail game.
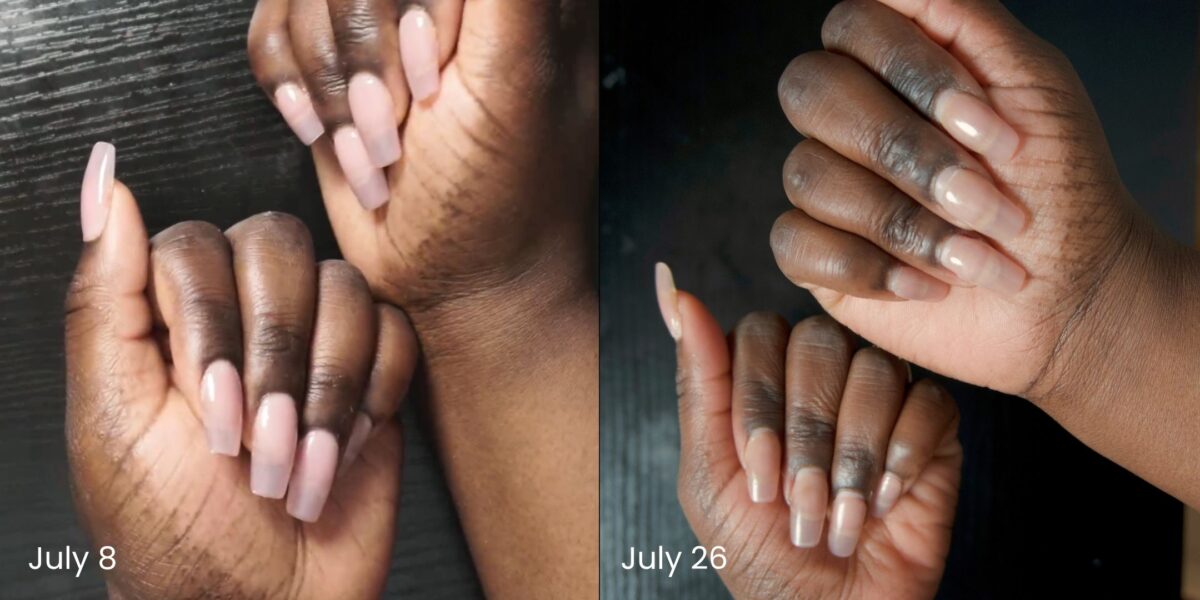
My results with over 2 weeks of retention.